7 Man Mechanics
The VFOA's 7-man mechanics presentation by Justin Fortier — who has what on free kicks, goal line, punts, measurements and pass keys, with the field diagrams for each.
Download the 2022 7-man mechanics manual (PDF, 12 slides) — the original slide deck. Everything on it is written out below.
Who's who
The deck uses single letters on most slides and the longer forms in the keys diagrams at the end.
| On most slides | In the keys diagrams | Position |
|---|---|---|
| R | R | Referee |
| U | U | Umpire |
| H | HL | Head Linesman |
| L | LJ | Line Judge |
| F | FJ | Field Judge |
| S | SJ | Side Judge |
| B | BJ | Back Judge |
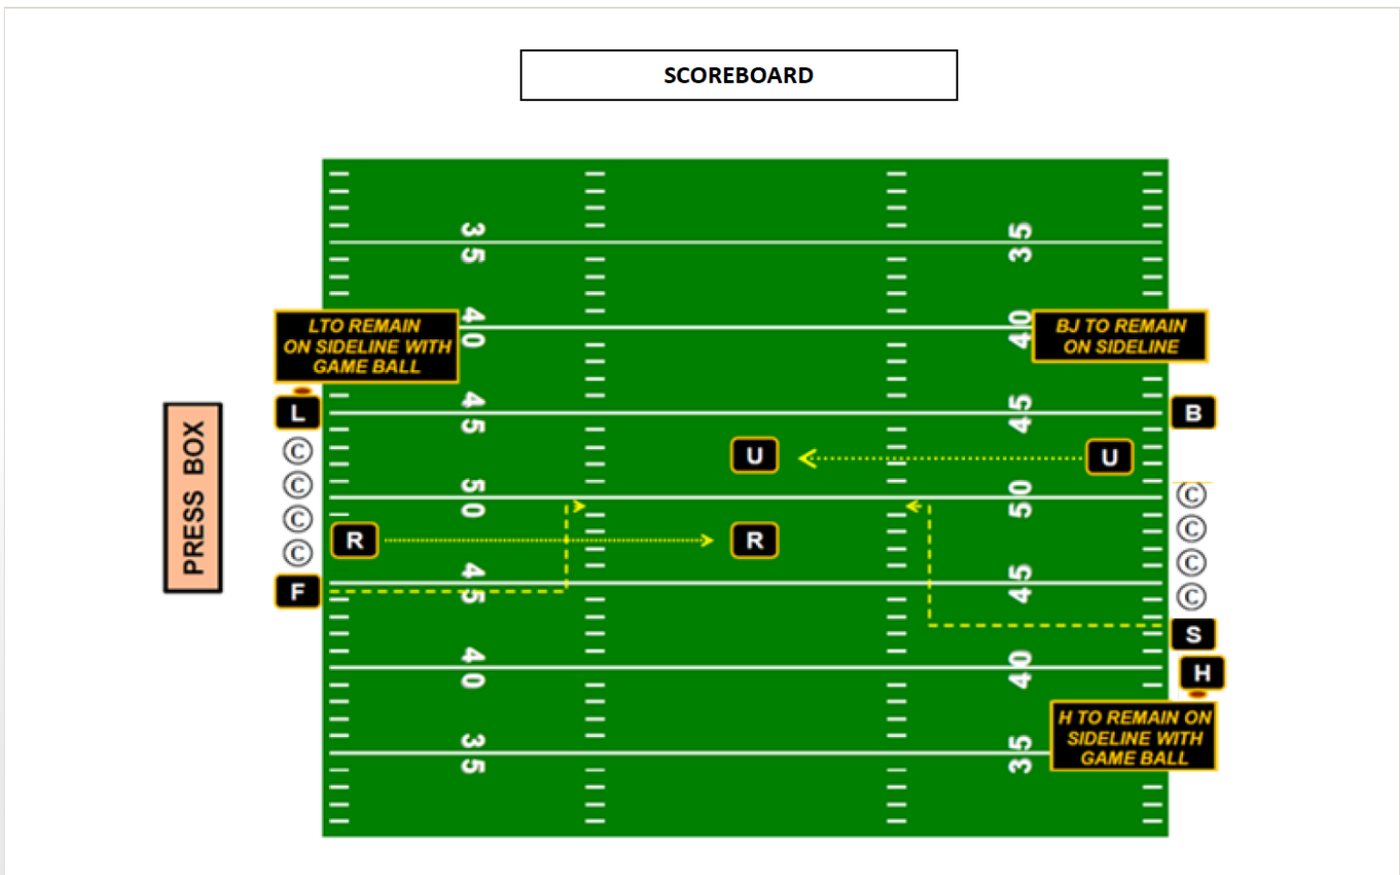
Coin toss
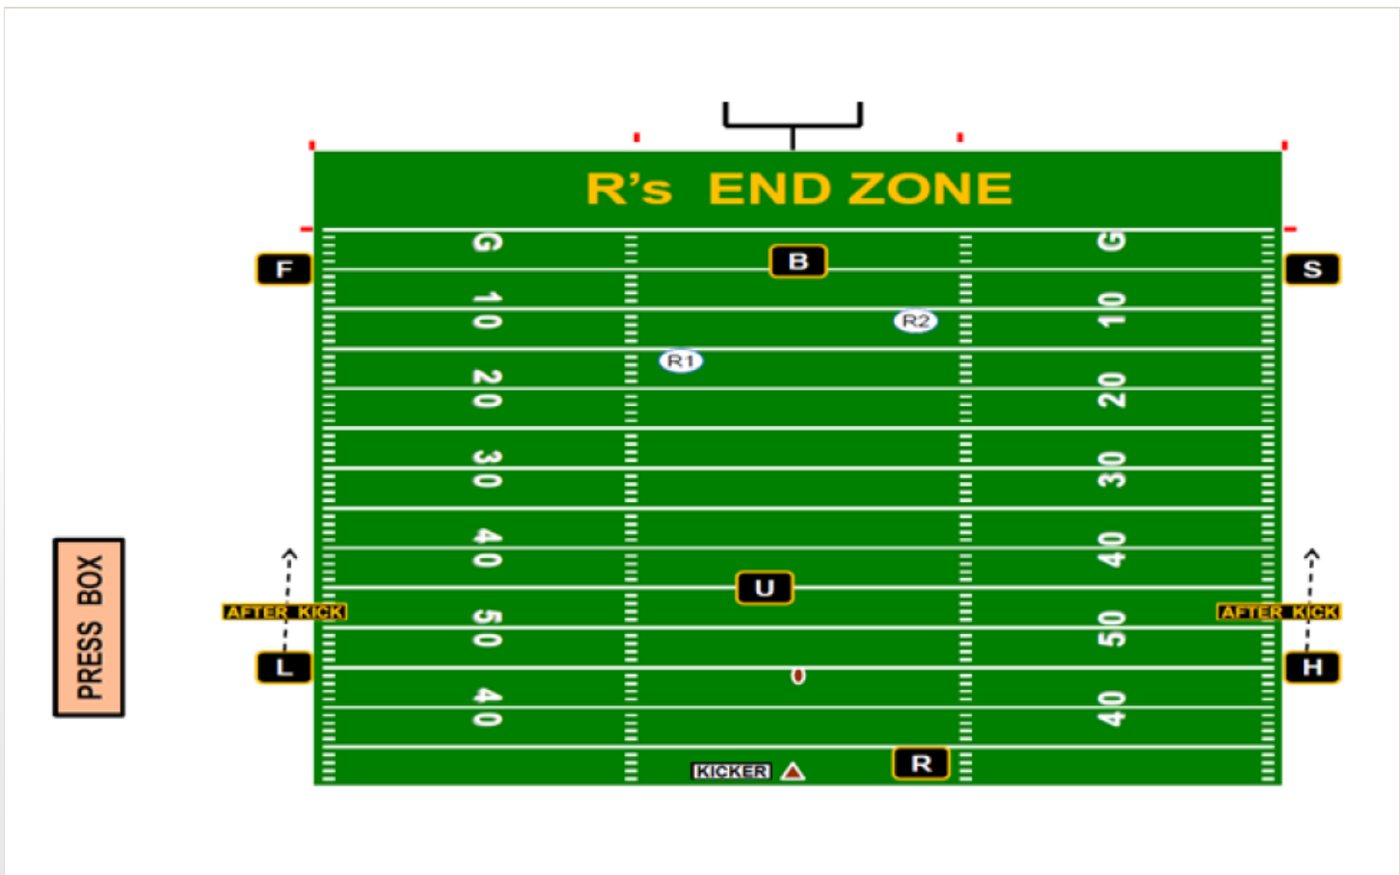
Free kicks
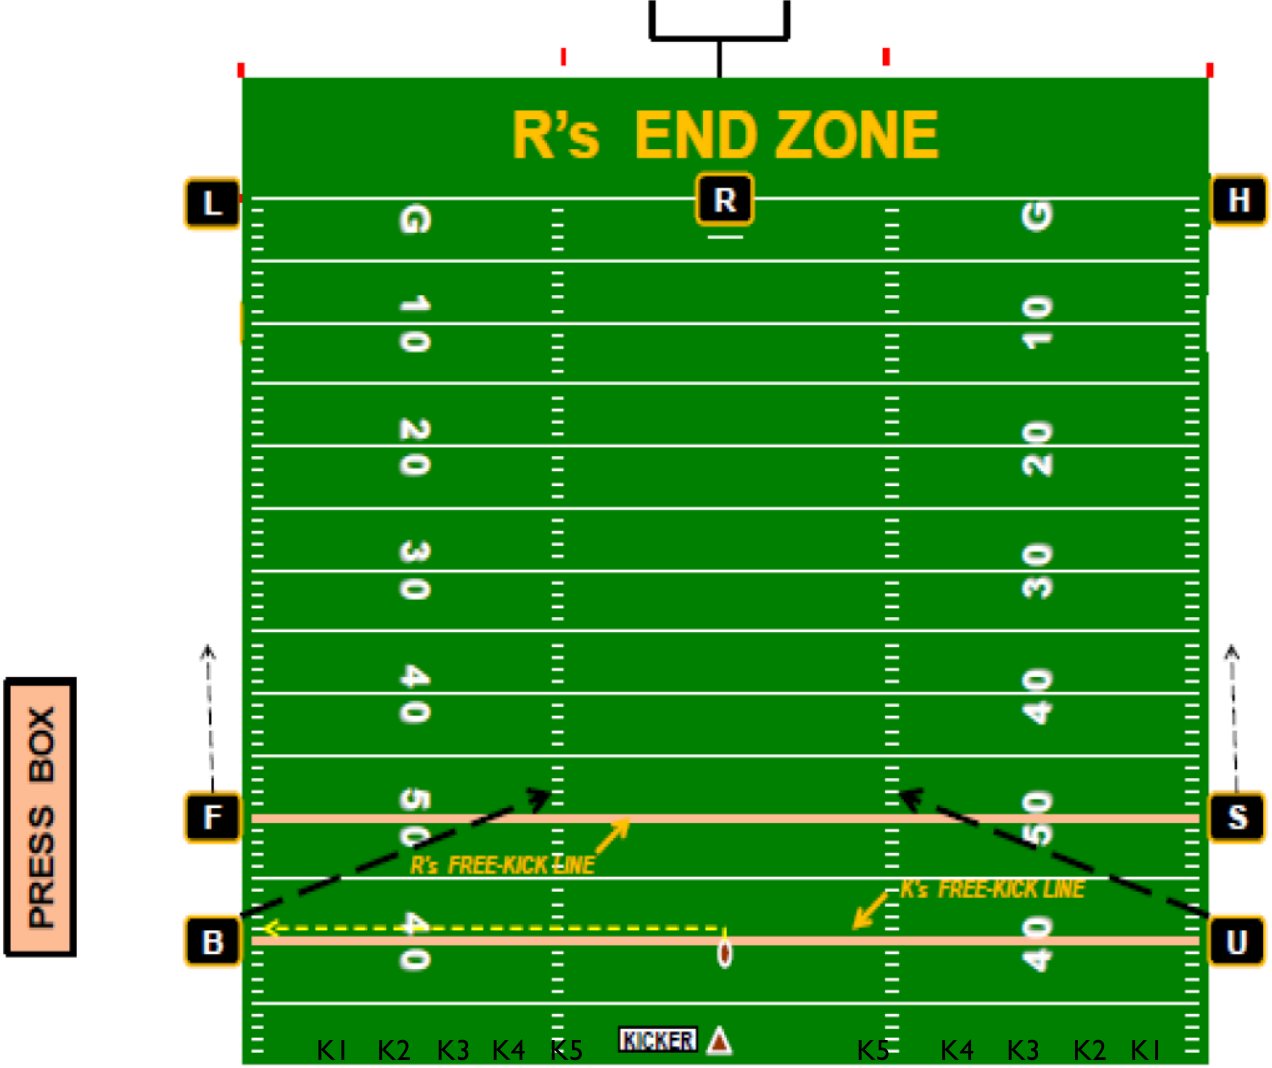
- L, H and R — Own blocking in front of the receiver, and the initial wave through the blocks. Progress to the 2 yard line.
- F and S — Follow K2 and K3 on your side of the field, as far as you can. If they separate, stay on the key that is most likely to be fouled, i.e. closest to the ball or first through the line of blockers. You have goal line responsibility.
- B and U — Follow K4 and K5. If unbalanced and K5 is really the 6th man on the other side of the kicker, he's yours. Same as F and S — stay on the man most likely to be fouled if they separate.
Onside kicks
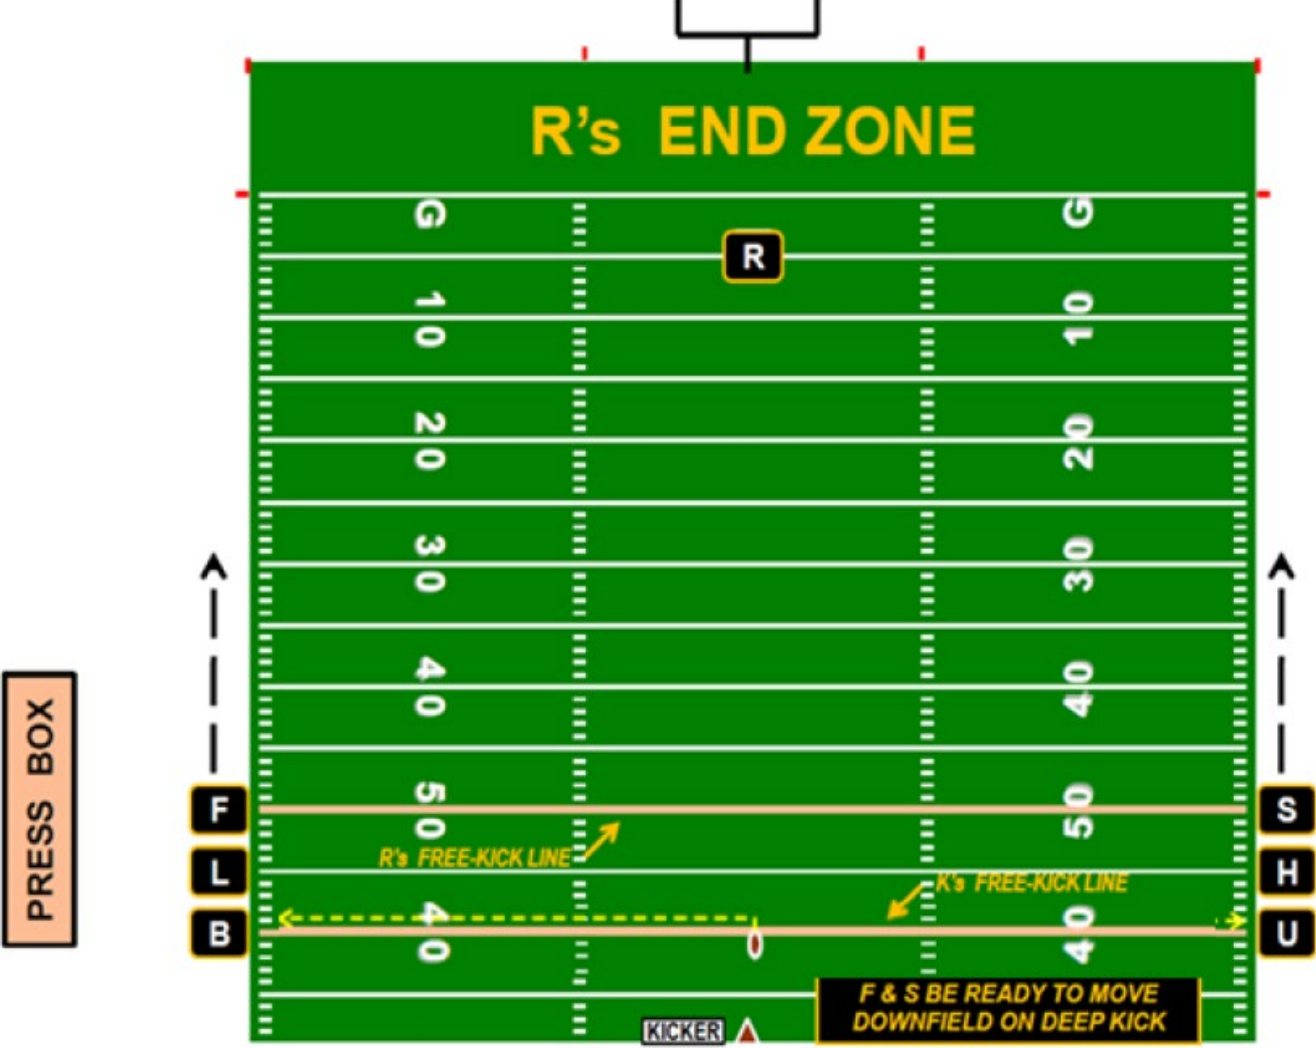
- F and S — You have the ball crossing, possession, and if kicked deep, progress.
- L and H — You have early blocks, and help on any touches.
- B and U — Kicking team restraining line, "pane of glass" philosophy. Help with early touching as well. Rule on pop-up kicks, and the goal line if R returns it.
- R — You own blocking and the runner on deep kicks. Formation at the time of the kick as well.
- All — Be cognizant of the clock and its status. Wind it on legal touching, not on illegal touching. If the returner is not grounded when recovering the kick, time should come off the clock.
Goal line
- R and U — Cover as you would any other play.
- B — Goal line coverage responsibility for any play snapped outside the 25 yard line.
- S and F — Responsible for goal line coverage on any play snapped outside the 7 yard line. Take forward progress only on plays that end between the 2 yard line and the goal line. Align off the back corner pylons from the 7 and in.
- H and L — Have goal line coverage for plays snapped from the 7 yard line and in. For plays snapped outside the 7 yard line, you own forward progress down to the 2 yard line.
Reverse goal line
- R, S, F and B — Cover plays as you normally would.
- U — Line of scrimmage responsibilities for plays inside the 10 yard line.
- H and L — Move immediately to the goal line for plays snapped from the 3 and in. If snapped from the 3 to the 7, H should hold the line of scrimmage and L should move back to the goal line with R to help with forward progress.
Punts
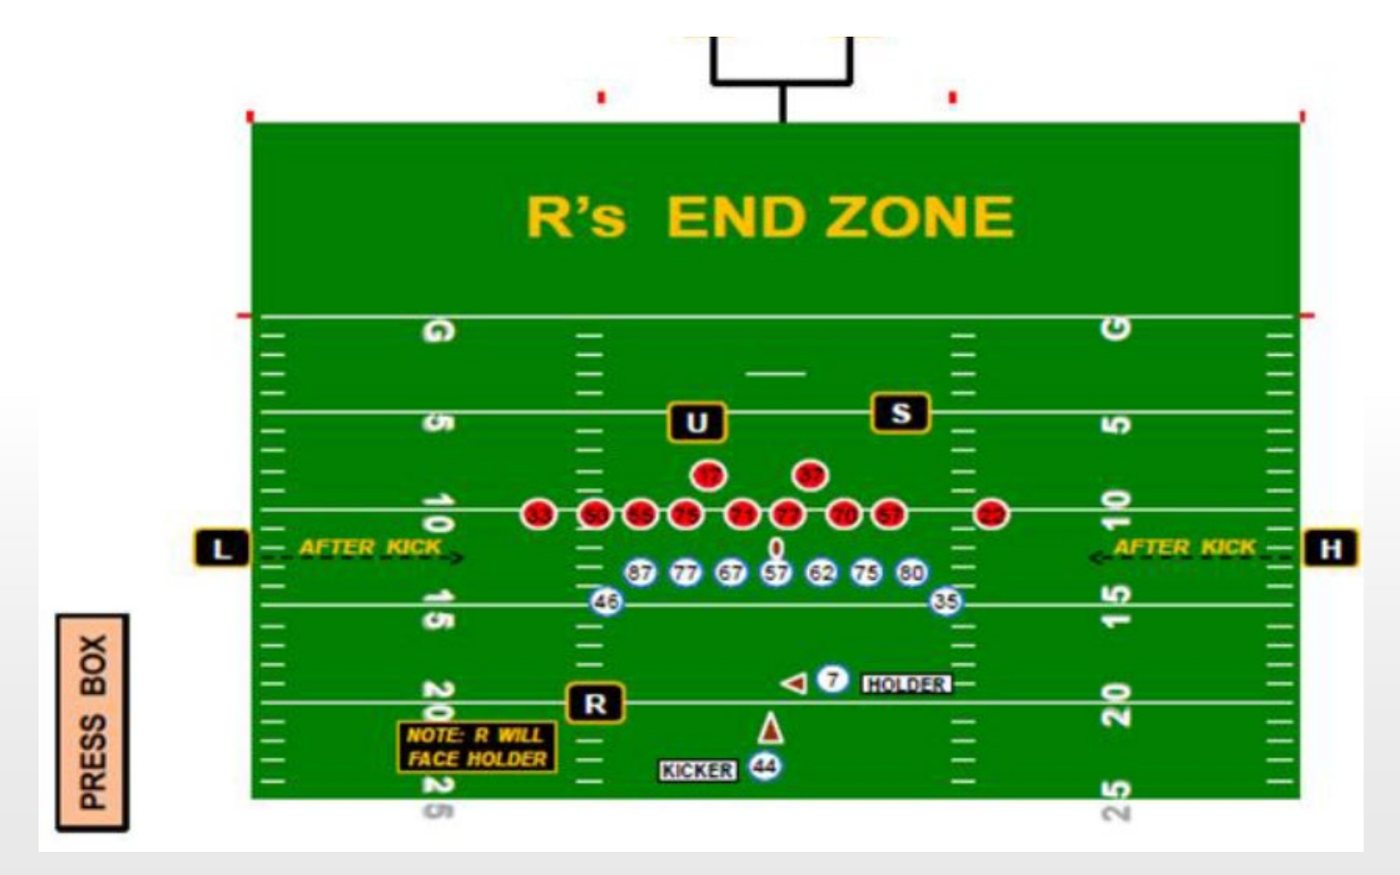
Field goals and trys
Measurements
- R — Remain over the ball and rule if the line to gain was reached.
- L — Mark the line spot for H to spot the clip.
- H — Grab the clip and have the chain crew move onto the field for the measurement. Place the clip at L's spot.
- S — Move the down box to the front stake. Obtain a game ball from the sideline.
- U — Take the front stake from the chain crew; once the clip is in position and firmly held by H, stretch the chains.
- B — Place a beanbag below the foremost point of the ball. Hold the ball in place throughout the measurement.
- F — Obtain a game ball from the sideline. Clear players out of the way so the chains and crew can work efficiently.
Scrimmage plays
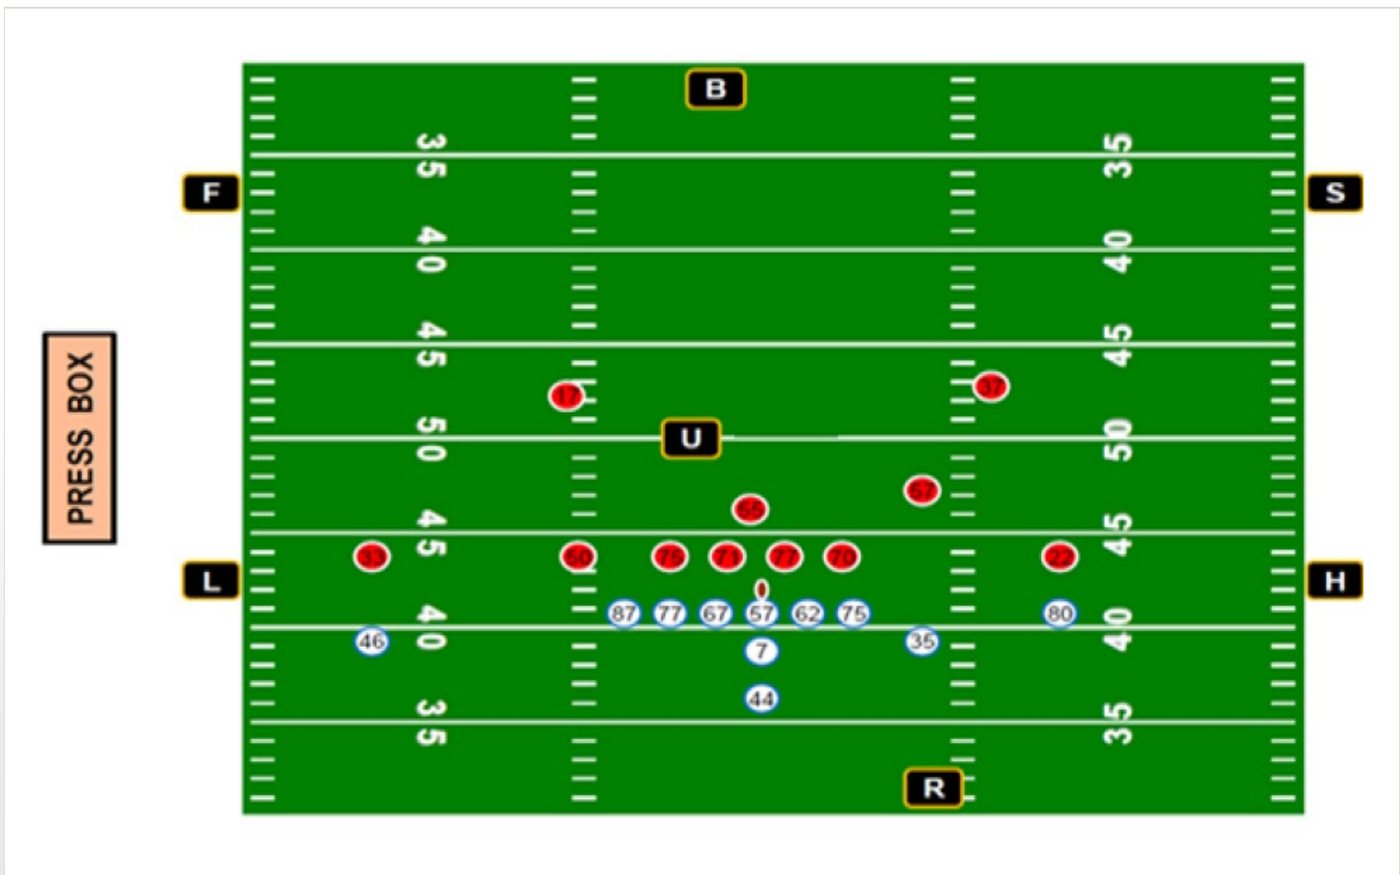
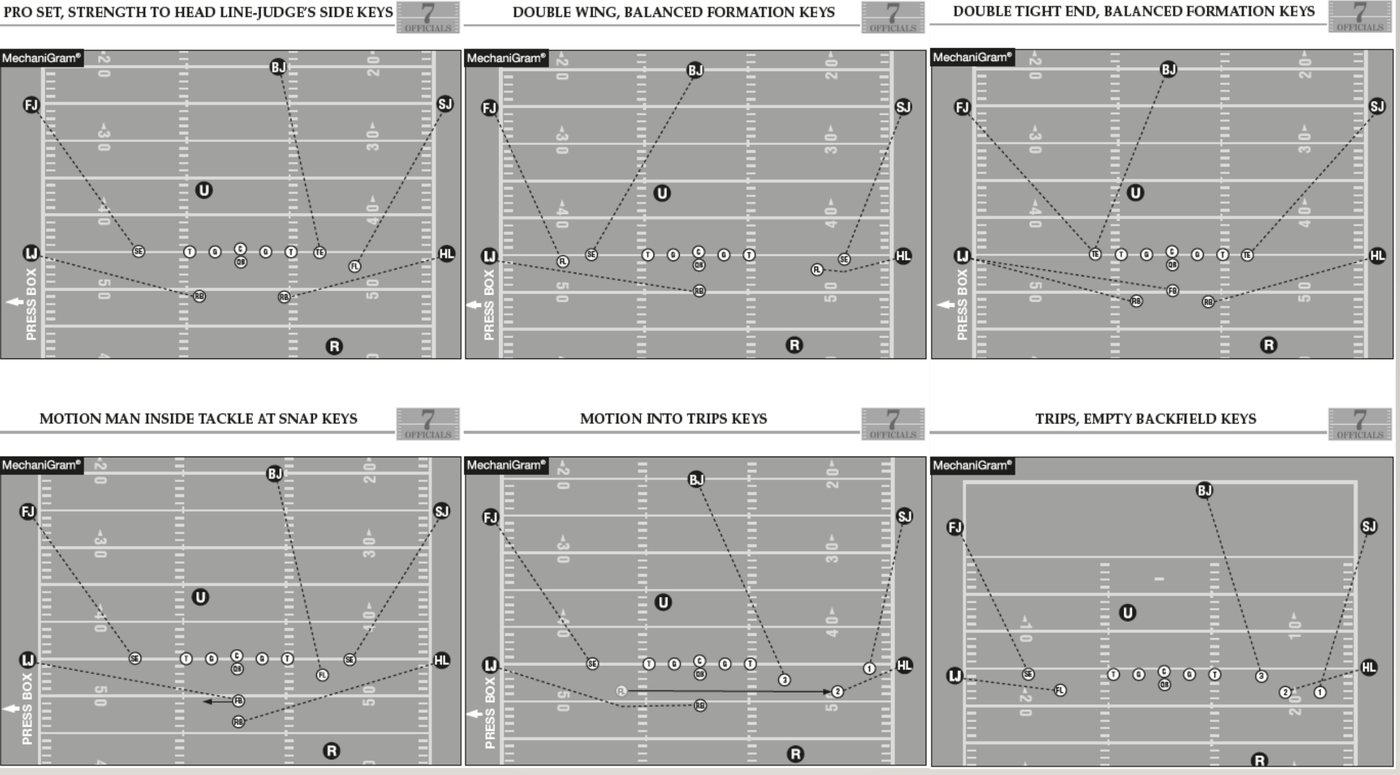
Pass keys
- F and S — Widest eligible receivers to your side.
- B — Second widest receiver to the strong side (L's side in balanced formations), or the third eligible receiver in trips.
- H — Second wide receiver in balanced or trips, otherwise key on the closest back releasing to your side.
- L — Second wide receiver in trips, otherwise the backs in the backfield.
Keys by formation